提示:文章写完后,目录可以自动生成,如何生成可参考右边的帮助文档
前言
之前一篇ADI demo工程的编译是ADI不推荐的方法,而且确实在后面NO-OS的软件部分的造成了麻烦,手动添加源代码文件总会发现不是缺了这个就是缺了那个。显然不是很方便
而ADI官方是说
our recommended build flow is to use make and the command line versions of the tools. This method highly facilitates our overall build and release process as it automatically builds the required libraries and dependencies.
然后分为Linux环境和Windows环境
Linux的暂时不研究,先看看Windows下面的
The best option on Windows is to use Cygwin. When installing it, select the ‘make’ and ‘git’ packages. The manual changes to your ‘.bashrc’ do a lot look like that of the Linux environment.
export PATH=$PATH:/cygdrive/d/Xilinx/Vivado/202x.x/bin:/cygdrive/d/Xilinx/Vitis/202x.x/bin
export PATH=$PATH:/cygdrive/d/intelFPGA_pro/2x.x/quartus/bin64
If you do not want to install Cygwin, there may still be some alternatives. There are ‘make’ alternatives for ‘windows command prompt’, minimalist GNU for Windows (‘MinGW’), or the ‘cygwin’ variations installed by the tools itself. Some of these may not be fully functional with our scripts and/or projects. If you are an Intel user, the “Nios II Command Shell” do support make. If you are a Xilinx user, use the ‘gnuwin’ installed as part of the SDK, usually C:XilinxVitis202x.xgnuwinbin.
既然官方推荐用 Cygwin,那我们也还是先试试这个吧,后面有时间看看 gnuwin 这个行不行
Cygwin 安装
在官网下载 https://cygwin.com/install.html

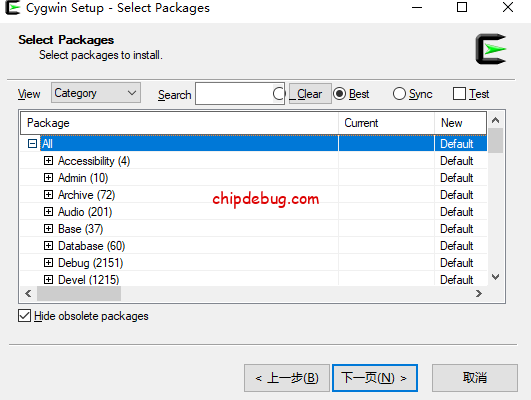
一路下一步,碰到这个页面时这里选择这个

然后在一路下一步

然后弹出来一大堆包和库等可以选择安装,根据上面的提示要安装 make 和 git。那我们需要找到make和git两个包,
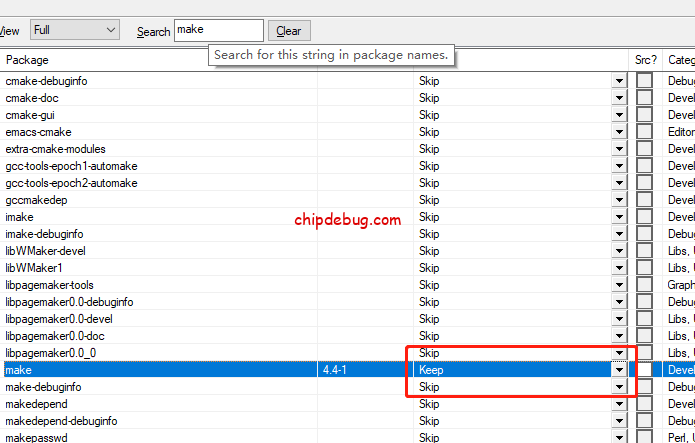
搜索make,把skip改成最新的4.4-1,因为我这里是已经安装过了,显示的是keep,如果一开始没有安装的话,是Skip的
同样 git也是这么操作。
然后点击下一步,然后就安装完成了。

工程编译
工程编译就很简单了,只要依次输入
export PATH=$PATH:/cygdrive/d/Xilinx/Vivado/2019.2/bin
cd /cygdrive/H/test/NEW_cgywin/hdl-hdl_2019_r2/projects/adrv9371x/zc706
make
这样,它就自己跑起来了,一开始有个错误

找到对应的log去查看,发现版本号没改。在project和library文件件中的scripts文件夹内分别有adi_project_xilinx.tcl和adi_ip_xilinx.tcl,里面有个版本号要跟目前使用的vivado版本设置成一致的。修改了之后,后面就都是OK了,尾巴上还有一个FAILED,打开LOG一看,其实bit已经生成了,后面的操作无关紧要了。所以可以不管了

打开vivado GUI工程,发现确实也已经生成bit了

总结
所以说官方推荐的实际上还是最方便的,只是需要一个Cygwin工具而已。PL这端实际上问题不大,主要是要看看使用Cygwin 能不能方便的把PS端也建立起来,接着摸索看了


没有回复内容